实现康威的生命游戏
设计
在我们深入研究之前,我们需要考虑一些设计选择。
无限宇宙
生命游戏是在一个无限的宇宙中进行的,但我们没有无限的内存和计算能力。 解决这个相当烦人的限制通常有以下三种方式之一:
-
跟踪宇宙的哪个子集发生了有趣的事情,并根据需要扩展该区域。 在最坏的情况下,这种扩展是无界的,实现会越来越慢,最终会耗尽内存。
-
创建一个固定大小的宇宙,其中边缘的单元格比中间的单元格具有更少的邻居。 这种方法的缺点是,像滑翔机一样到达宇宙尽头的无限模式被扼杀了。
-
创建一个固定大小的周期性宇宙,其中边缘的单元格有环绕宇宙另一侧的邻居。 因为邻居环绕着宇宙的边缘,所以滑翔机可以永远运行。
我们将实施第三个选项。
Rust 和 JavaScript 的接口
⚡ 这是本教程中需要理解和掌握的最重要的概念之一!
JavaScript 的垃圾收集堆——其中分配了“对象”、“数组”和 DOM 节点——与 WebAssembly 的线性内存空间不同,我们的 Rust 值存在于其中。 WebAssembly 目前无法直接访问垃圾收集堆(截至 2018 年 4 月,这预计会随着 “接口类型”提案 的出现而改变)。 另一方面,JavaScript可以读写WebAssembly的线性内存空间,但只能作为标量值的ArrayBuffer(u8,i32,f64,等等)。 WebAssembly 函数也接受和返回标量值。 这些是构成所有 WebAssembly 和 JavaScript 通信的构建块。
wasm_bindgen 定义了如何跨这个边界处理复合结构的共同理解。 它涉及装箱 Rust 结构,并将指针包装在 JavaScript 类中以提高可用性,或者从 Rust 索引到 JavaScript 对象表。 wasm_bindgen 非常方便,但它并没有消除考虑我们的数据表示的需要,以及跨越这个边界传递的值和结构。 相反,将其视为实现您选择的界面设计的工具。
在设计 WebAssembly 和 JavaScript 之间的接口时,我们希望针对以下属性进行优化:
-
最大限度地减少进出 WebAssembly 线性内存的复制。 不必要的副本会带来不必要的开销。
-
最小化序列化和反序列化。 与副本类似,序列化和反序列化也会产生开销,并且通常也会产生复制。 如果我们可以将不透明的句柄传递给数据结构——而不是在一侧序列化它,将它复制到 WebAssembly 线性内存中的某个已知位置,然后在另一侧反序列化——我们通常可以减少很多开销。
wasm_bindgen帮助我们定义和使用 JavaScript 对象或盒装 Rust 结构的不透明句柄。
在我们的生活游戏中连接 Rust 和 JavaScript
让我们首先列举一些要避免的危险。 我们不想在每个滴答声中将整个宇宙复制到 WebAssembly 线性内存中。 我们不想为宇宙中的每个单元格分配对象,也不想强加跨界调用来读取和写入每个单元格。
这让我们何去何从? 我们可以将宇宙表示为一个平面数组,它存在于 WebAssembly 线性内存中,每个单元格都有一个字节。 0 是死单元格,1 是活单元格。
以下是 4 x 4 宇宙在内存中的样子:
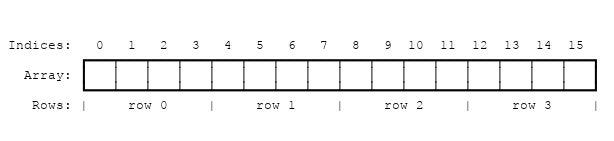
为了找到宇宙中某一行和某一列的单元格的阵列索引,我们可以使用这个公式:
index(row, column, universe) = row * width(universe) + column
我们有几种方法可以将宇宙的单元格暴露给 JavaScript。首先,我们将为 "宇宙 "实现std::fmt::Display,我们可以用它来生成一个渲染为文本字符的单元格的RustString。然后这个Rust字符串从WebAssembly的线性内存中复制到JavaScript的垃圾收集堆中的一个JavaScript字符串,然后通过设置HTMLtextContent来显示。在本章的后面,我们将发展这个实现,以避免在堆之间复制宇宙的单元,并渲染到<canvas>。
另一个可行的设计方案是让Rust在每次打勾后返回一个改变状态的单元格的列表,而不是将整个宇宙暴露给JavaScript。这样一来,JavaScript就不需要在渲染时遍历整个宇宙,只需要遍历相关的子集。这样做的好处是,这种基于delta的设计在实现上稍显困难。
Rust 实现
在上一章中,我们克隆了一个初始项目模板。 我们现在将修改该项目模板。
让我们首先从 wasm-game-of-life/src/lib.rs 中删除 alert 导入和 greet 函数,并将它们替换为单元格的类型定义:
#![allow(unused)]
fn main() {
#[wasm_bindgen]
#[repr(u8)]
#[derive(Clone, Copy, Debug, PartialEq, Eq)]
pub enum Cell {
    Dead = 0,
    Alive = 1,
}
}
重要的是我们有#[repr(u8)],这样每个单元格都表示为一个字节。 同样重要的是,Dead 变体为 0,Alive 变体为 1,以便我们可以轻松地通过加法计算单元格的活邻居。
接下来,让我们定义宇宙。 宇宙有宽度和高度,以及长度为 width * height 的单元向量。
#![allow(unused)]
fn main() {
#[wasm_bindgen]
pub struct Universe {
    width: u32,
    height: u32,
    cells: Vec<Cell>,
}
}
为了访问给定行和列的单元格,我们将行和列转换为单元格向量的索引,如前所述:
#![allow(unused)]
fn main() {
impl Universe {
    fn get_index(&self, row: u32, column: u32) -> usize {
        (row * self.width + column) as usize
    }

    // ...
}
}
为了计算一个单元格的下一个状态,我们需要计算它的邻居有多少是活着的。 让我们编写一个 live_neighbor_count 方法来做到这一点!
#![allow(unused)]
fn main() {
impl Universe {
    // ...

    fn live_neighbor_count(&self, row: u32, column: u32) -> u8 {
        let mut count = 0;
        for delta_row in [self.height - 1, 0, 1].iter().cloned() {
            for delta_col in [self.width - 1, 0, 1].iter().cloned() {
                if delta_row == 0 && delta_col == 0 {
                    continue;
                }

                let neighbor_row = (row + delta_row) % self.height;
                let neighbor_col = (column + delta_col) % self.width;
                let idx = self.get_index(neighbor_row, neighbor_col);
                count += self.cells[idx] as u8;
            }
        }
        count
    }
}
}
live_neighbor_count 方法使用 deltas 和 modulo 来避免使用 if 对宇宙边缘进行特殊外壳。 当应用 -1 的增量时,我们添加 self.height - 1 并让模数做它的事情,而不是尝试减去 1。 row 和 column 可以是 0,如果我们试图从它们中减去 1,就会出现一个无符号整数下溢。
现在我们拥有了从当前计算下一代所需的一切! 游戏的每条规则都直接转换为“匹配”表达式的条件。 此外,因为我们希望 JavaScript 控制滴答发生的时间,我们将把这个方法放在一个 #[wasm_bindgen] 块中,以便它暴露给 JavaScript。
#![allow(unused)]
fn main() {
/// Public methods, exported to JavaScript.
#[wasm_bindgen]
impl Universe {
    pub fn tick(&mut self) {
        let mut next = self.cells.clone();

        for row in 0..self.height {
            for col in 0..self.width {
                let idx = self.get_index(row, col);
                let cell = self.cells[idx];
                let live_neighbors = self.live_neighbor_count(row, col);

                let next_cell = match (cell, live_neighbors) {
                    // Rule 1: Any live cell with fewer than two live neighbours
                    // dies, as if caused by underpopulation.
                    (Cell::Alive, x) if x < 2 => Cell::Dead,
                    // Rule 2: Any live cell with two or three live neighbours
                    // lives on to the next generation.
                    (Cell::Alive, 2) | (Cell::Alive, 3) => Cell::Alive,
                    // Rule 3: Any live cell with more than three live
                    // neighbours dies, as if by overpopulation.
                    (Cell::Alive, x) if x > 3 => Cell::Dead,
                    // Rule 4: Any dead cell with exactly three live neighbours
                    // becomes a live cell, as if by reproduction.
                    (Cell::Dead, 3) => Cell::Alive,
                    // All other cells remain in the same state.
                    (otherwise, _) => otherwise,
                };

                next[idx] = next_cell;
            }
        }

        self.cells = next;
    }

    // ...
}
}
到目前为止,宇宙的状态被表示为一个单元格向量。 为了使人能够读懂这些内容,让我们实现一个基本的文本渲染器。 这个想法是将宇宙一行一行地写成文本,对于每个活着的单元格,打印 Unicode 字符◼(“黑色中型方块”)。 对于死单元格,我们将打印◻(一个“白色中等正方形”)。
通过实现 Rust 标准库中的 Display 特性,我们可以添加一种以面向用户的方式格式化结构的方法。 这也会自动给我们一个 to_string 方法。
#![allow(unused)]
fn main() {
use std::fmt;

impl fmt::Display for Universe {
    fn fmt(&self, f: &mut fmt::Formatter) -> fmt::Result {
        for line in self.cells.as_slice().chunks(self.width as usize) {
            for &cell in line {
                let symbol = if cell == Cell::Dead { '◻' } else { '◼' };
                write!(f, "{}", symbol)?;
            }
            write!(f, "\n")?;
        }

        Ok(())
    }
}
}
最后,我们定义了一个构造函数,用一个有趣的活单元格和死单元格的模式来初始化宇宙,以及一个`render'方法:
#![allow(unused)]
fn main() {
/// Public methods, exported to JavaScript.
#[wasm_bindgen]
impl Universe {
    // ...

    pub fn new() -> Universe {
        let width = 64;
        let height = 64;

        let cells = (0..width * height)
            .map(|i| {
                if i % 2 == 0 || i % 7 == 0 {
                    Cell::Alive
                } else {
                    Cell::Dead
                }
            })
            .collect();

        Universe {
            width,
            height,
            cells,
        }
    }

    pub fn render(&self) -> String {
        self.to_string()
    }
}
}
这样,我们的生命游戏的Rust部分就完成了。
在wasm-game-of-life目录下运行wasm-pack build,将其重新编译为WebAssembly。
用JavaScript进行渲染
首先,让我们在wasm-game-of-life/www/index.html中添加一个<pre>元素,将宇宙渲染进去,就在<script>标签上方:
<body>
  <pre id="game-of-life-canvas"></pre>
  <script src="./bootstrap.js"></script>
</body>
此外,我们希望<pre>在网页的中间位置。我们可以使用CSS柔性框来完成这个任务。在wasm-game-of-life/www/index.html的<head>内添加以下<style>标签:
<style>
  body {
    position: absolute;
    top: 0;
    left: 0;
    width: 100%;
    height: 100%;
    display: flex;
    flex-direction: column;
    align-items: center;
    justify-content: center;
  }
</style>
在 wasm-game-of-life/www/index.js 的顶部,让我们修复我们的导入以引入 Universe 而不是旧的 greet 函数:
import { Universe } from "wasm-game-of-life";
另外,让我们获取刚刚添加的 <pre> 元素并实例化一个新的 Universe:
const pre = document.getElementById("game-of-life-canvas");
const universe = Universe.new();
JavaScript在一个requestAnimationFrame循环中运行。在每个迭代中,它将当前的宇宙画到<pre>,然后调用Universe::tick。
const renderLoop = () => {
  pre.textContent = universe.render();
  universe.tick();

  requestAnimationFrame(renderLoop);
};
为了开始渲染过程,我们所要做的就是为渲染循环的第一次迭代进行初始调用:
requestAnimationFrame(renderLoop);
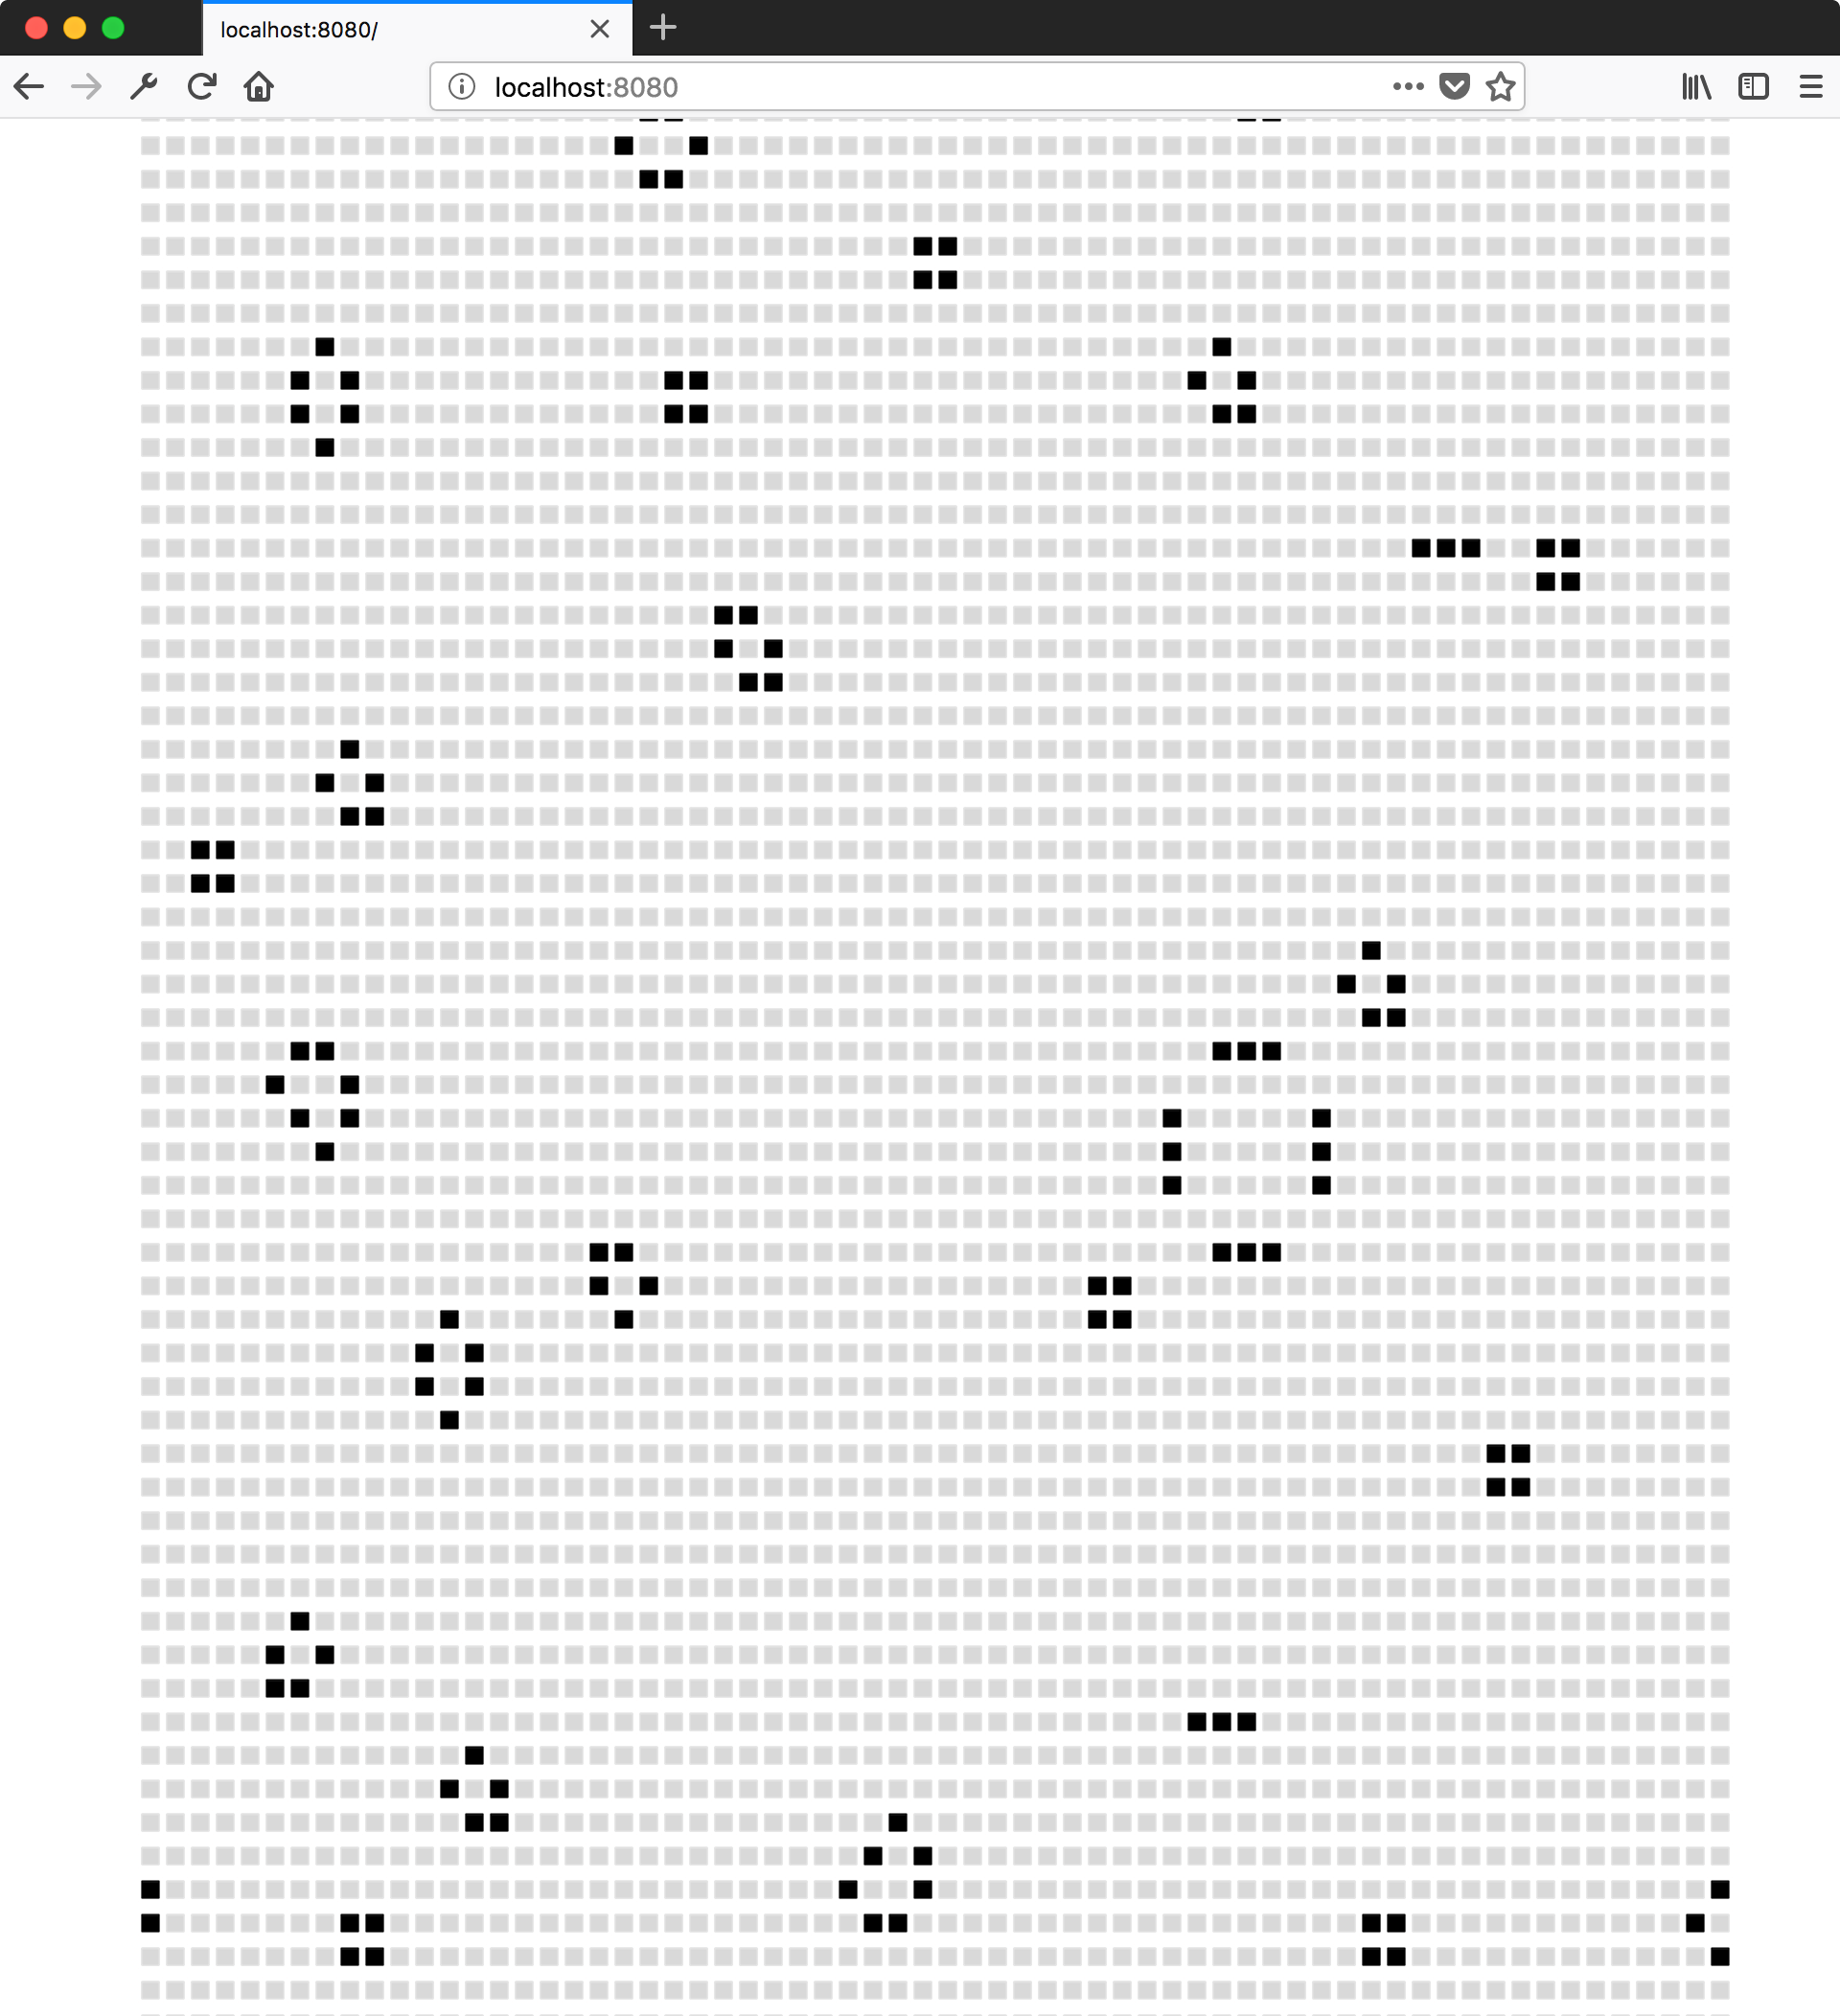
确保你的开发服务器仍在运行(在wasm-game-of-life/www内运行npm run start),这就是http://localhost:8080/应该有的样子:
直接从内存向画布渲染
在Rust中生成(和分配)一个String,然后让wasm-bindgen将其转换为有效的JavaScript字符串,就会对宇宙的单元格进行不必要的复制。由于JavaScript代码已经知道了宇宙的宽度和高度,并且可以直接读取构成单元格的WebAssembly的线性内存,我们将修改render方法以返回一个指向单元格数组开始的指针。
另外,我们将改用Canvas API来代替渲染Unicode文本。我们将在本教程的其余部分使用这种设计。
在wasm-game-of-life/www/index.html中,让我们把之前添加的<pre>替换成我们要渲染的<canvas>(它也应该在<body>中,在加载我们JavaScript的<script>之前):
<body>
  <canvas id="game-of-life-canvas"></canvas>
  <script src='./bootstrap.js'></script>
</body>
为了从Rust的实现中获得必要的信息,我们需要为一个宇宙的宽度、高度和指向其单元格数组的指针增加一些getter函数。所有这些也都暴露在JavaScript中。在wasm-game-of-life/src/lib.rs中增加这些内容:
#![allow(unused)]
fn main() {
/// Public methods, exported to JavaScript.
#[wasm_bindgen]
impl Universe {
    // ...

    pub fn width(&self) -> u32 {
        self.width
    }

    pub fn height(&self) -> u32 {
        self.height
    }

    pub fn cells(&self) -> *const Cell {
        self.cells.as_ptr()
    }
}
}
接下来,在wasm-game-of-life/www/index.js中,让我们也从wasm-game-of-life中导入Cell,并定义一些常量,我们将在渲染到画布时使用:
import { Universe, Cell } from "wasm-game-of-life";

const CELL_SIZE = 5; // px
const GRID_COLOR = "#CCCCCC";
const DEAD_COLOR = "#FFFFFF";
const ALIVE_COLOR = "#000000";
现在,让我们重写这段JavaScript代码的其余部分,不再写入<pre>的textContent,而是绘制到<canvas>:
// Construct the universe, and get its width and height.
const universe = Universe.new();
const width = universe.width();
const height = universe.height();

// Give the canvas room for all of our cells and a 1px border
// around each of them.
const canvas = document.getElementById("game-of-life-canvas");
canvas.height = (CELL_SIZE + 1) * height + 1;
canvas.width = (CELL_SIZE + 1) * width + 1;

const ctx = canvas.getContext('2d');

const renderLoop = () => {
  universe.tick();

  drawGrid();
  drawCells();

  requestAnimationFrame(renderLoop);
};
为了画出单元格之间的网格,我们画了一组等距的水平线,和一组等距的垂直线。这些线纵横交错,形成网格。
const drawGrid = () => {
  ctx.beginPath();
  ctx.strokeStyle = GRID_COLOR;

  // Vertical lines.
  for (let i = 0; i <= width; i++) {
    ctx.moveTo(i * (CELL_SIZE + 1) + 1, 0);
    ctx.lineTo(i * (CELL_SIZE + 1) + 1, (CELL_SIZE + 1) * height + 1);
  }

  // Horizontal lines.
  for (let j = 0; j <= height; j++) {
    ctx.moveTo(0,                           j * (CELL_SIZE + 1) + 1);
    ctx.lineTo((CELL_SIZE + 1) * width + 1, j * (CELL_SIZE + 1) + 1);
  }

  ctx.stroke();
};
我们可以通过memory直接访问WebAssembly的线性内存,它被定义在原始wasm模块wasm_game_of_life_bg。为了绘制单元格,我们得到一个指向宇宙单元格的指针,构建一个覆盖单元格缓冲区的Uint8Array,遍历每个单元格,并根据单元格是死是活,分别绘制一个白色或黑色的矩形。通过使用指针和覆盖,我们避免了在每次打勾时将单元格复制到边界上。
// Import the WebAssembly memory at the top of the file.
import { memory } from "wasm-game-of-life/wasm_game_of_life_bg";

// ...

const getIndex = (row, column) => {
  return row * width + column;
};

const drawCells = () => {
  const cellsPtr = universe.cells();
  const cells = new Uint8Array(memory.buffer, cellsPtr, width * height);

  ctx.beginPath();

  for (let row = 0; row < height; row++) {
    for (let col = 0; col < width; col++) {
      const idx = getIndex(row, col);

      ctx.fillStyle = cells[idx] === Cell.Dead
        ? DEAD_COLOR
        : ALIVE_COLOR;

      ctx.fillRect(
        col * (CELL_SIZE + 1) + 1,
        row * (CELL_SIZE + 1) + 1,
        CELL_SIZE,
        CELL_SIZE
      );
    }
  }

  ctx.stroke();
};
为了开始渲染过程,我们将使用与上面相同的代码来启动渲染循环的第一次迭代:
drawGrid();
drawCells();
requestAnimationFrame(renderLoop);
注意,我们在这里调用drawGrid()和drawCells(),然后再调用requestAnimationFrame()。我们这样做的原因是为了在我们进行修改之前画出宇宙的_初始_状态。如果我们只是简单地调用requestAnimationFrame(renderLoop),我们最终会出现这样的情况:第一个被绘制的帧实际上是在第一次调用universe.tick()之后,也就是这些单元格生命中的第二个 "打勾"。
It Works!
通过从 wasm-game-of-life 目录中运行以下命令来重建 WebAssembly 和绑定:
wasm-pack build
确保您的开发服务器仍在运行。 如果不是,请从 wasm-game-of-life/www 目录中重新启动它:
npm run start
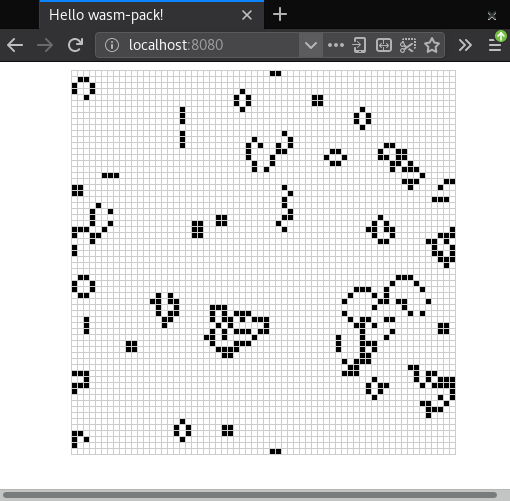
如果你刷新http://localhost:8080/,你应该会看到精彩的生活展示!
顺便说一句,还有一个非常简洁的算法来实现生命游戏,称为 hashlife。 它使用积极的记忆,并且实际上可以指数更快来计算它运行的时间越长的后代! 鉴于此,您可能想知道为什么我们没有在本教程中实现 hashlife。 这超出了本文的范围,我们专注于 Rust 和 WebAssembly 的集成,但我们强烈建议您自行了解 hashlife!
练习
-
用单个太空船初始化宇宙。
-
不是对初始宇宙进行硬编码,而是生成一个随机的宇宙,其中每个单元格有 550 次存活或死亡的机会。
提示:使用
js-syscrate 导入Math.randomJavaScript 函数.答案
*首先,在`wasm-game-of-life/Cargo.toml`中添加`js-sys`作为依赖项:*# ... [dependencies] js-sys = "0.3" # ...然后,使用
js_sys::Math::random函数来投掷硬币:#![allow(unused)] fn main() { extern crate js_sys; // ... if js_sys::Math::random() < 0.5 { // Alive... } else { // Dead... } } -
用一个字节表示每个单元,使单元的迭代变得容易,但它的代价是浪费了内存。每个字节有八个比特,但是我们只需要一个比特来表示每个单元格是活的还是死的。重构数据表示,使每个单元格只使用一个比特的空间。
答案
在Rust中,你可以使用
fixedbitsetcrate和它的FixedBitSet类型来表示单元,而不是Vec<Cell>:#![allow(unused)] fn main() { // Make sure you also added the dependency to Cargo.toml! extern crate fixedbitset; use fixedbitset::FixedBitSet; // ... #[wasm_bindgen] pub struct Universe { width: u32, height: u32, cells: FixedBitSet, } }Universe 构造函数可以通过以下方式进行调整:
#![allow(unused)]
fn main() {
pub fn new() -> Universe {
    let width = 64;
    let height = 64;

    let size = (width * height) as usize;
    let mut cells = FixedBitSet::with_capacity(size);

    for i in 0..size {
        cells.set(i, i % 2 == 0 || i % 7 == 0);
    }

    Universe {
        width,
        height,
        cells,
    }
}
}
要在宇宙的下一个刻度中更新单元格,我们使用
FixedBitSet的set方法:#![allow(unused)] fn main() { next.set(idx, match (cell, live_neighbors) { (true, x) if x < 2 => false, (true, 2) | (true, 3) => true, (true, x) if x > 3 => false, (false, 3) => true, (otherwise, _) => otherwise }); }要将指向位开头的指针传递给 JavaScript,您可以将
FixedBitSet转换为切片,然后将切片转换为指针:#![allow(unused)] fn main() { #[wasm_bindgen] impl Universe { // ... pub fn cells(&self) -> *const u32 { self.cells.as_slice().as_ptr() } } }在 JavaScript 中,从 Wasm 内存构造一个
Uint8Array和之前一样,只是数组的长度不再是width * height,而是width * height / 8因为我们每比特有一个单元格而不是 每字节:const cells = new Uint8Array(memory.buffer, cellsPtr, width * height / 8);给定一个索引和
Uint8Array,您可以使用以下函数确定是否设置了 nth 位:const bitIsSet = (n, arr) => { const byte = Math.floor(n / 8); const mask = 1 << (n % 8); return (arr[byte] & mask) === mask; };鉴于所有这些,新版本的
drawCells看起来像这样:const drawCells = () => { const cellsPtr = universe.cells(); // This is updated! const cells = new Uint8Array(memory.buffer, cellsPtr, width * height / 8); ctx.beginPath(); for (let row = 0; row < height; row++) { for (let col = 0; col < width; col++) { const idx = getIndex(row, col); // This is updated! ctx.fillStyle = bitIsSet(idx, cells) ? ALIVE_COLOR : DEAD_COLOR; ctx.fillRect( col * (CELL_SIZE + 1) + 1, row * (CELL_SIZE + 1) + 1, CELL_SIZE, CELL_SIZE ); } } ctx.stroke(); };